
Software Versions:
- FreePBX ISO – STABLE SNG7-PBX-64bit-2011-5
- sipml5 – 2.1.4
Prerequisite:
- FreePBX was hosted on cloud like Vultr and AWS
- Inbound and Outbound Calls are working.
- Used a FQDN to your freepbx hostname and installed valid certificate like Letsecrypt
- Working Extensions
Enable WebRTC Ports
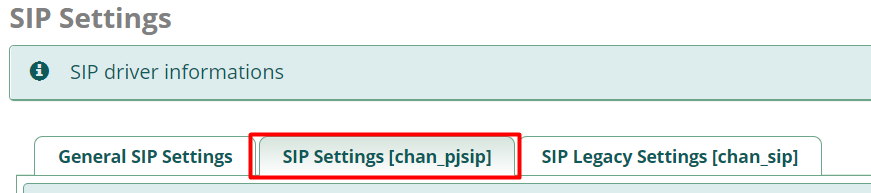
Navigate to Settings > Asterisk SIP Settings > SIP Settings [chan_pjsip] Tab
Under Transport set ws and wss to Yes
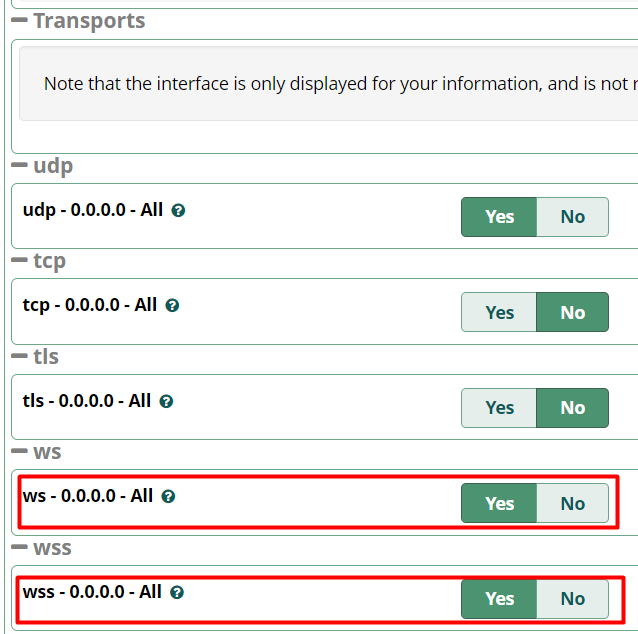
Once done click Submit and Apply the changes.
Setup the sip realm or FQDN.
Place your realm or FQDN to sip_general_custom.conf file.
Navigate to Admin > Config Edit > sip_general_custom.conf > Place your realm or FQDN as seen on image.
Save and Apply the Changes

Configure the extension that will going to use on sipml5 api.
Edit the extension configuration.
Navigate to Applications > Extensions > Edit the Extensions > Advanced Tab
Under Advance Tab set the following:

- Enable AVPF – Yes
- Enable ICE Support – Yes
- Media Encryption – DTLS-SRTP
- Direct Media – No
- Enable DTLS – Yes
- Auto Generate Certificate – No
- Use Certificate – <Select the FreePBX FQDN Valid Certificate>
- DTLS Verify – Fingerprint
- DTLS Setup – Act/Pass
Submit and Apply the changes.
Configure Sipml5 API
Open sipml5 live demo link: https://www.doubango.org/sipml5/call.htm
Click on Expert Mode and setup the following.
- Disable Video – Checked
- WebSocket Server URL – wss://pbx.domain.com:8089/ws
- Disable 3GPP Early IMS – Checked
- Disable debug messages – Checked
- Cache the media stream – Checked
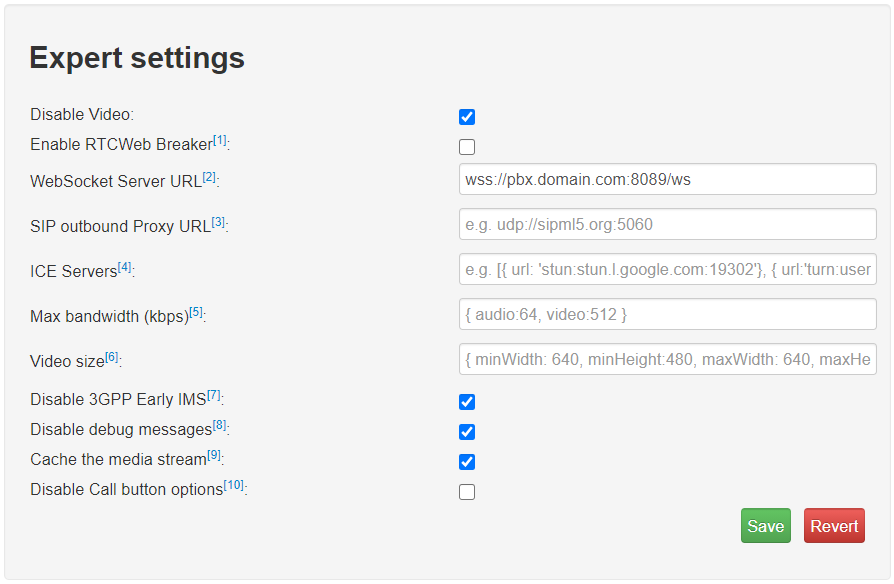
Once done click on Save
On Registration Page Set the following.
- Display Name – Any Display Name you would like
- Private Identity – Extension Number
- Public Identity – sip:<extension number>@<FQDN>
- Password – Extension Password
- Realm – FQDN
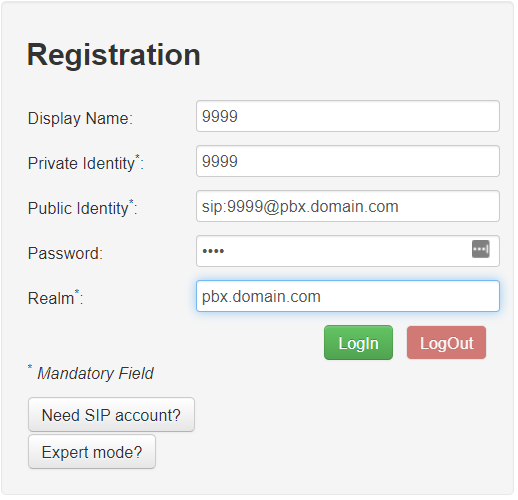
Once done click on Login button to connect to your freepbx.
If everything is correct it will display a “Connected” status above the registration page.

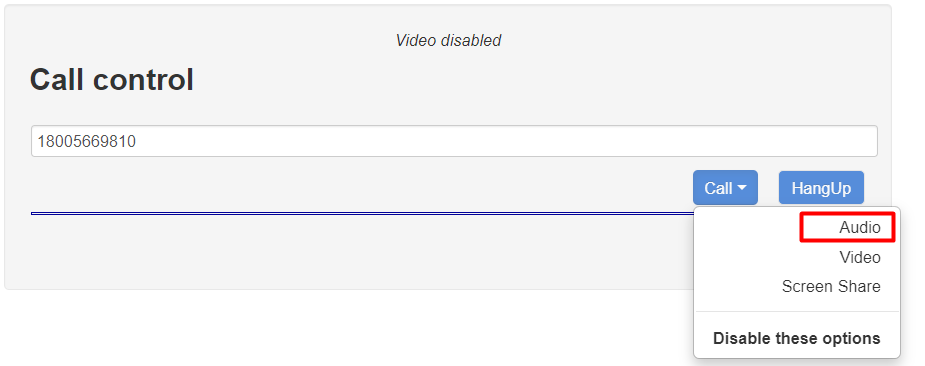
Once connected you can now use the Call Control Section to dial a number and test if it’s working.
FreePBX Behind NAT
If your freepbx are behind a NAT, setup the STUN server to avoid issues specially on audio.
In you freepbx navigate to Settings > SIP Settings > General SIP Settings Tab
Under Media Transport Settings Add the STUN Server
- STUN Server Address: stun.l.google.com:19302

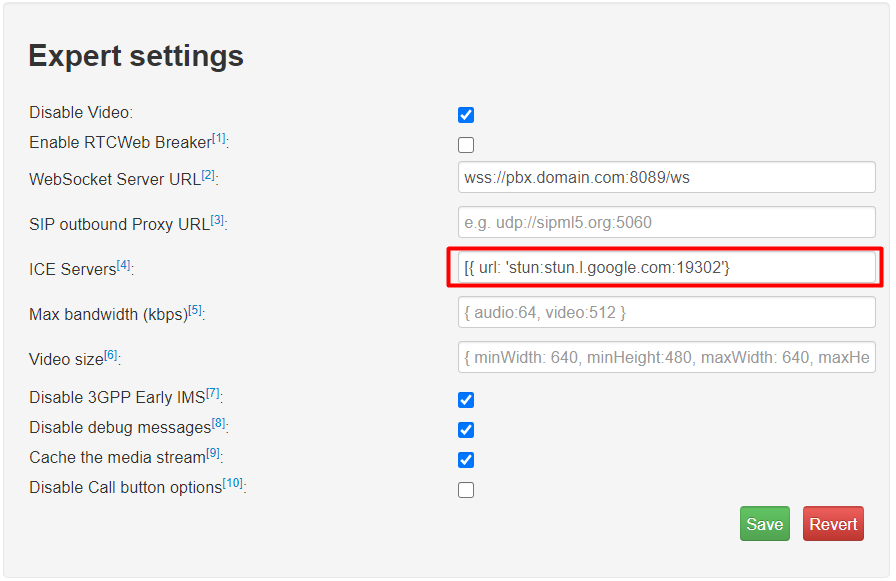
Then on your sipml5 Expert Settings
- ICE Servers: [{ url: ‘stun:stun.l.google.com:19302’}]
That’s it pansit. If you have any questions or encountered any error please message it on comment section and I will try to answer it as soon as possible.
Thank you.