
Environment
- Ubuntu 22.04 managed by Runcloud
- Node.js 20
- Wiki.js 2.5.303
Step 1: SSH to the server and Install GPG keys and prerequisite packages.
sudo apt-get update
sudo apt-get install -y ca-certificates curl gnupg
sudo mkdir -p /etc/apt/keyrings
curl -fsSL https://deb.nodesource.com/gpgkey/nodesource-repo.gpg.key | sudo gpg --dearmor -o /etc/apt/keyrings/nodesource.gpg
Step 2: Create Debian Repo
Specify the version that you want to install.
echo "deb [signed-by=/etc/apt/keyrings/nodesource.gpg] https://deb.nodesource.com/node_20.x nodistro main" | sudo tee /etc/apt/sources.list.d/nodesource.lisStep 3: Install NodeJS
sudo apt-get update
sudo apt-get install nodejs -y
node -v
Once the installation is complete, you should be able to start using NodeJs right away without any need to restart your server.
Step 4: Deploying a Node App on RunCloud
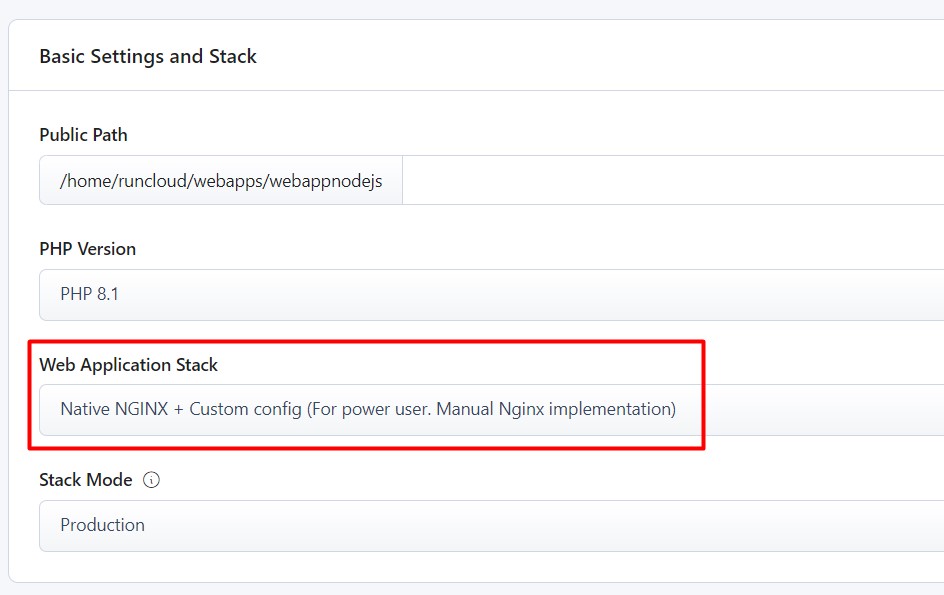
Deploy an empty web application on your RunCloud server. Give it a descriptive name and specify the user account, domain name, and backup configuration.
On “Web Application Stack” make sure to select “Native Nginx + Custom config”
Step 5: On the Runcloud dashboard, create a database on your server and assign it to your webapp. Take note the db name, user and password.
Step 6: On the Web Application go to NGINX Config and add “Prox – Effortlessly turn NGINX as a proxy server” then paste this config.
location / {
proxy_pass http://localhost:3000/;
proxy_set_header X-Forwarded-For $proxy_add_x_forwarded_for;
proxy_set_header X-Real-IP $remote_addr;
proxy_set_header X-Forwarded-Host $host;
proxy_set_header Host $http_host;
proxy_set_header X-Forwarded-Proto $scheme;

}
Step 7: Go to your web app folder. Make sure that you are using the “runcloud” user before execute this commands.
Ex: /home/runcloud/webapps/webappnodejs
Step 8: Download the latest version of Wiki.js and extract the package
wget https://github.com/Requarks/wiki/releases/latest/download/wiki-js.tar.gz
tar xzf wiki-js.tar.gz
Step 8: Rename the sample config file to config.yml
mv config.sample.yml config.ymlStep 9: Configure the database
nano config.ymlChange this following lines with the credentials from Step 5.
db:
  type: mariadb

  # PostgreSQL / MySQL / MariaDB / MS SQL Server only:
  host: localhost
  port: 3306
  user: <database username>
  pass: <database password>
  db: <database name>
Step 10: Run as service
There are several solutions to run Wiki.js as a background service. We’ll focus on systemd in this guide as it’s available in nearly all linux distributions.
Create a new file named wiki.service inside directory /etc/systemd/system
nano /etc/systemd/system/wiki.servicePaste the following contents (assuming your wiki is installed at /home/runcloud/webapps/webappnodejs):
[Unit]
Description=Wiki.js
After=network.target

[Service]
Type=simple
ExecStart=/usr/bin/node server
Restart=always
# Consider creating a dedicated user for Wiki.js here:
User=runcloud
Environment=NODE_ENV=production
WorkingDirectory=/home/runcloud/webapps/webappnodejs

[Install]
WantedBy=multi-user.target
Save the service file (CTRL+X, followed by Y).
Reload systemd
systemctl daemon-reloadRun the service:
systemctl start wikiEnable the service on system boot.
systemctl enable wikiSource: